Writing the plugin base
Getting started in Twasi-Plugin development is easy. All you need is basic knowledge of the Java programming language and an IDE (Integrated Development Environment).
We highly recommend using IntelliJ IDEA for Java development since it is smartest IDE available and heavily speeds up coding. There's a free community version available that has everything you'll ever need. You can download it here.
We are going to create an example plugin without further functionality. On the next pages we will add commands, variables, permissions, services, an API and a database repository for it.
To continue, please make sure that you have the JDK 1.8 installed. You can also use an OpenJDK Build of version 1.8 from here. Twasi development is working fine with it.
Creating the project
First you need to create a new Maven project. I use IntelliJ IDEA for that. If you want to use another IDE, please find out how to create a Maven project with it on the internet.
Maven is a dependency injection system for Java. It will help you by adding the Twasi-Plugin-Framework to your project. Please don't be deterred if you haven't used Maven yet. It's quite simple to get started and simplifies your dependency management.
To do that, click on "Create new Project", choose Maven on the left and select (or configure) your JDK 1.8. After that you need to choose a package and an ArtifactID. Please use your own package name (which usually consists of a domain name that you own backwards: merlinw.de > de.merlinw, twasi.net > net.twasi). The ArtifactID is your plugin's / project's name.
Maven will now create this file structure for you:
|
+-- src/
|   +-- main/
|   |   +-- java/
|   |   +-- resources/
|   |
|   +-- test/
|       +-- java/
|
+-- pom.xml
|
Adding the framework using Maven
Open up the pom.xml file. Here you can specify the dependencies of your plugin. It will look very similar to this:
<?xml version="1.0" encoding="UTF-8"?>
<project xmlns="http://maven.apache.org/POM/4.0.0"
         xmlns:xsi="http://www.w3.org/2001/XMLSchema-instance"
         xsi:schemaLocation="http://maven.apache.org/POM/4.0.0 http://maven.apache.org/xsd/maven-4.0.0.xsd">
    <modelVersion>4.0.0</modelVersion>

    <groupId>de.merlinw</groupId>
    <artifactId>ExamplePlugin</artifactId>
    <version>1.0-SNAPSHOT</version>

</project>
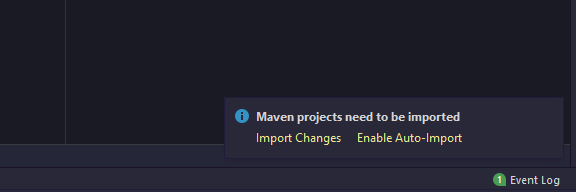
IntelliJ will prompt you to enable auto import at the bottom right corner. You should do that, it's very useful!
Now we need to include Twasi-Core into our project to get access to the Plugin-Framework. We also need to tell Maven where to search for it. To do so, we add the Twasi-Artifactory as a repository and the Twasi-Core as a dependency (directly after the <version>-tag):
    <repositories>
        <repository>
            <snapshots>
                <enabled>false</enabled>
            </snapshots>
            <id>central</id>
            <name>libs-release</name>
            <url>https://artifactory.twasi.net/artifactory/libs-release</url>
        </repository>
        <repository>
            <snapshots/>
            <id>snapshots</id>
            <name>libs-snapshot</name>
            <url>https://artifactory.twasi.net/artifactory/libs-snapshot</url>
        </repository>
    </repositories>

    <dependencies>
        <dependency>
            <groupId>net.twasi</groupId>
            <artifactId>TwasiCore</artifactId>
            <version>0.0.1-SNAPSHOT</version>
            <scope>provided</scope>
        </dependency>
    </dependencies>
If you do not use IntelliJ or have auto-import disabled, make sure that maven imports the dependencies.
"<scope>provided</scope>" tells the Maven compiler not to include the Twasi-Core into your jar file when you compile your plugin. Since the plugin is loaded directly from the core, all classes of the framework will be available at runtime.
Creating the plugin's main classes
The TwasiPlugin class
The entry point of every Twasi-plugin is the TwasiPlugin-class. To add it, create your package inside of the "/src/main/java/" folder and add a new class to it (you can use any class name, I'll take ExamplePlugin) and make it extend TwasiPlugin like this:
package de.merlinw;

import net.twasi.core.logger.TwasiLogger;
import net.twasi.core.plugin.TwasiPlugin;
import net.twasi.core.plugin.api.TwasiUserPlugin;

public class ExamplePlugin extends TwasiPlugin {

    public Class<? extends TwasiUserPlugin> getUserPluginClass() {
        return null;
    }

    // To test if your plugin works, you can make it say hello on startup
    public void onActivate(){
        TwasiLogger.log.info("Hello! I'm the example plugin c:");
    }

}
The TwasiUserPlugin class
Every plugin needs to specify a TwasiUserPlugin-class. This class will be instantiated for each user who has installed the plugin. Add another class (I'll name it ExampleUserPlugin) and make it extend TwasiUserPlugin:
package de.merlinw;

import net.twasi.core.plugin.api.TwasiUserPlugin;

public class ExampleUserPlugin extends TwasiUserPlugin {
}
Now make your TwasiPlugin know your UserPlugin class using the getUserPluginClass() method:
package de.merlinw;

import net.twasi.core.plugin.TwasiPlugin;
import net.twasi.core.plugin.api.TwasiUserPlugin;

public class ExamplePlugin extends TwasiPlugin {

    public Class<? extends TwasiUserPlugin> getUserPluginClass() {
        return ExampleUserPlugin.class;
    }

}
Creating the plugin.yml file
Now you need to tell Twasi-Core where your TwasiPlugin-class is located. To do that and to give the core more information about your plugin (like it's name, the version etc.), create a new file called "plugin.yml" in the "/src/main/resources" directory containing the following properties:
name: "ExamplePlugin" # This should be unique
author: "Merlin Westphal"
main: de.merlinw.ExamplePlugin # Specify the full name including the package
description: "Just an example plugin"
You can find all available properties here.
Adding a plugin configuration
If your plugin needs a configuration (for API-Credentials e.g.), you can define a configuration template and let Twasi do the rest for you. It will create a yml file for you automatically that can be used in your code in no time.
If your plugin doesn't need further configuration properties, just skip this step!
The template class
You need to define the properties your configuration file should contain in a class like this:
public class MyPluginConfiguration {

    public String API_KEY = "API_TOKEN";
    public String API_SECRET = "API_SECRET";
    public String[] SCOPES = {};

}
Assign the template and load the configuration at runtime
In your TwasiPluginClass you can now pass this template to Twasi by defining a type parameter and get the configuration using the getConfiguration() method:
public class MyPlugin extends TwasiPlugin<MyPluginConfiguration> {

    public void onActivate(){
        MyPluginConfiguration config = this.getConfiguration();
        TwasiLogger.log.debug("API-Token: " + config.API_KEY);
    }

}
When the getConfiguration() method is called the first time, it will create a yaml file containing all fields of your template in the /plugins/config folder (plugin-name.yml). If you define values in the template, it will put them as default values into the yaml file.
Nesting properties
You can also nest properties by defining a SubClass like this:
public class MyPluginConfiguration {

    public int property = 10;
    public APICredentials API = new APICredentials();

    public class APICredentials {
        public String API_KEY = "API_TOKEN";
        public String API_SECRET = "API_SECRET";
        public String[] SCOPES = {};
    }

}
Building the plugin
To test your plugin in a local environment, you need to set up a Twasi-Core instance, if you haven't done that yet. You can learn how to do that here.
Your plugin base is finished and Twasi-Core should be able to load it. All you need to do now is to build it to get a .jar file. In IntelliJ, you can create a runtime-configuration for that. Just click "Add configuration" at the top bar of the IDE, click the add-button, choose Maven and enter "clean compile package" into the command-line field. Save the configuration and click run. Now Maven compiles your plugin and puts the .jar file into a new folder called "target".
If you don't use IntelliJ, please install Maven globally on your system. You can find a tutorial for that here.
After you've installed Maven, just open up a terminal in the root folder of your plugin (where the pom.xml file is located) and run "mvn clean compile package".
Continue
In the next part of the "Getting started" series you will learn how to add commands to your plugin!